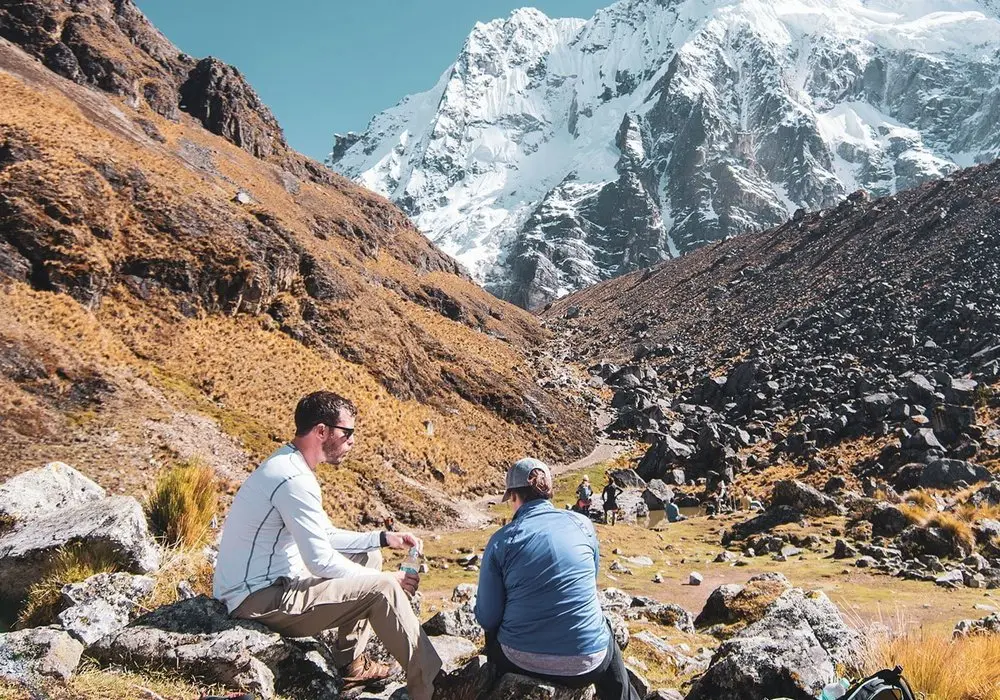
Standing at the base of the Humantay glacier, watching the mist swirl around jagged, snow-capped peaks while your breath forms clouds in the thin air, is a moment that stays with you forever. It is the moment reality sets in. You are not in a theme park; you are in the heart of the Peruvian Andes, about to embark on a pilgrimage that has been walked for centuries. If you are planning your journey to Machu Picchu and looking to escape the regimented crowds of the Classic Inca Trail, you have likely set your sights on the Salkantay route. But one question looms larger than the mountain itself: What is the real Salkantay Trek difficulty?
Is it a casual walk through the woods? Absolutely not. Is it an impossible feat reserved only for elite mountaineers with years of experience? Far from it. In this comprehensive, deep-dive guide, we are going to strip away the marketing fluff often found on travel brochures. We will give you an honest, unfiltered, and detailed breakdown of what it actually takes to conquer the “Savage Mountain.” We will analyze the terrain, the crushing altitude, the weather variables, and the mental grit required, helping you decide if this adventure is the right fit for your boots.
Understanding the Beast: What is the Salkantay Trek?
To truly grasp the challenge, you first have to understand the arena you are entering. The Salkantay Trek is widely considered the premier alternative route to Machu Picchu. Unlike the Classic Inca Trail, which is heavily regulated, paved with ancient stone steps, and capped at 500 people per day, the Salkantay route is a traverse through nature’s extremes. It is wilder, higher, and undeniably more diverse.
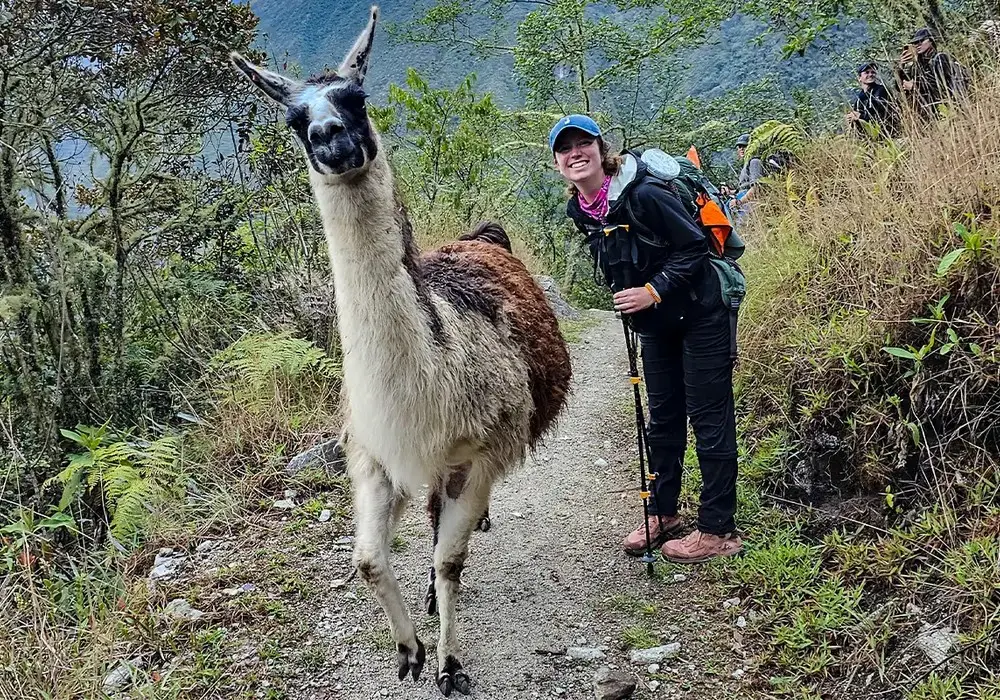
Named after the Apu Salkantay—the “Wild” or “Savage” Mountain in the Quechua language—this route takes you from the biting cold of glacial highlands down into the steaming humidity of the high jungle (Ceja de Selva). It is a journey of stark contrasts. You start in a landscape that looks like trekking on the surface of the moon and end up walking through lush coffee plantations, passing waterfalls, and dodging tropical butterflies.
The Spiritual Weight of the Mountain
To understand the Salkantay Trek difficulty, you must understand the spirit of the land. For the Incas, mountains were not just geological formations; they were gods, or Apus. Salkantay, rising to 6,271 meters (20,574 feet), was considered the protector of the cloud forest and the Andean highlands. It was a deity that demanded respect, and in many ways, it still does.
Historically, this network of trails wasn’t just for trade; it had cosmological significance. The pass you will cross lies directly south of the Milky Way during certain times of the year, aligning earth and sky. Walking here isn’t just physical exercise; it’s stepping into a relationship between humans and the Andes that has existed for millennia. When you struggle for breath on the pass, you are feeling the same reverence and fear the ancients felt. This mental aspect—the feeling of being small in a massive landscape—adds a layer to the difficulty that can’t be measured in kilometers.
The Great Debate: Salkantay Trek vs. The Inca Trail
This is the most common question we hear from travelers in Cusco. “I want to do Salkantay for the views and the solitude, but I’m scared it’s too hard. Should I just do the Inca Trail?”
Let’s settle this with nuance. The Salkantay Trek is physically more demanding than the Classic Inca Trail, but technically less frustrating.
Here is the detailed breakdown of why:
1. Distance and Duration: An Endurance Game
The standard Salkantay trek covers approximately 74 kilometers (46 miles) over 5 days. Compare this to the Classic Inca Trail, which is roughly 43 kilometers (26 miles) over 4 days. You are walking nearly double the distance.
On the Salkantay, your average daily mileage is higher. You need to be prepared to be on your feet, moving, for 7 to 9 hours a day. If you are not accustomed to endurance walking, the sheer volume of steps will wear you down by Day 3. The Inca Trail is shorter, but more intense in short bursts. Salkantay is a marathon; the Inca Trail is a series of steep stair-climbs.
2. The Altitude Factor: The Invisible Wall
This is where the Salkantay Trek difficulty spikes. The highest point you reach on the Salkantay Trek is the Salkantay Pass at 4,630 meters (15,190 feet).
Compare this to the infamous “Dead Woman’s Pass” (Warmiwañusca) on the Inca Trail, which sits at 4,215 meters (13,828 feet). That 415-meter difference might not look like much on a piece of paper, but at that elevation, the oxygen density drops significantly. Every step above 4,000 meters feels heavier. Your heart has to work harder to pump oxygen to your muscles. On the Salkantay route, you spend a longer duration at high altitude before dropping into the jungle, which can trigger symptoms of altitude sickness (Soroche) more aggressively if you aren’t acclimatized.
3. Terrain: Steps vs. Slopes
Here is where Salkantay actually wins points for comfort, depending on your knees. The Inca Trail is notorious for its uneven, knee-destroying stone steps. Thousands of them. Going down the Inca Trail can be more painful than going up because of the constant impact on your joints.
Salkantay, by contrast, uses natural trails, gravel paths, and earthen switchbacks. It is a steep slog, yes, especially approaching the pass, but it is a gradual incline rather than a mechanical stepping motion. If you have bad knees or hate stairs, Salkantay (with the proper use of trekking poles) might actually be the “easier” option for your specific biomechanics, despite the longer distance and higher altitude.
Detailed Terrain Analysis: What Are You Walking On?
The terrain is the definition of a “mixed bag,” and adaptability is key. You will navigate:
- Loose Scree and Gravel: This is most common on the ascent to the Salkantay Pass and the immediate descent. It can be slippery, and you need to watch your footing to avoiding sliding backward.
- Rocky Riverbeds: In the valleys, you often walk alongside rivers where the path is strewn with river stones. This requires ankle stability.
- Muddy Jungle Paths: Once you cross into the Amazon basin side, the dirt turns to clay. If it rains, this becomes a slip-and-slide.
- Dirt Roads: In the lower valleys near Santa Teresa and the hydroelectric station, you will walk on packed dirt roads shared with local transport.

Day-by-Day Difficulty Breakdown (Standard 5-Day Itinerary)
To truly understand the Salkantay Trek difficulty, we need to dissect the daily grind. The difficulty isn’t spread evenly; it comes in waves of intensity followed by recovery.
Day 1: The Deceptive Warm-Up and the Humantay Test
- The Route: Challacancha to Soraypampa (Camp 1), followed by a side hike to Humantay Lake.
- Difficulty: Moderate to Hard.
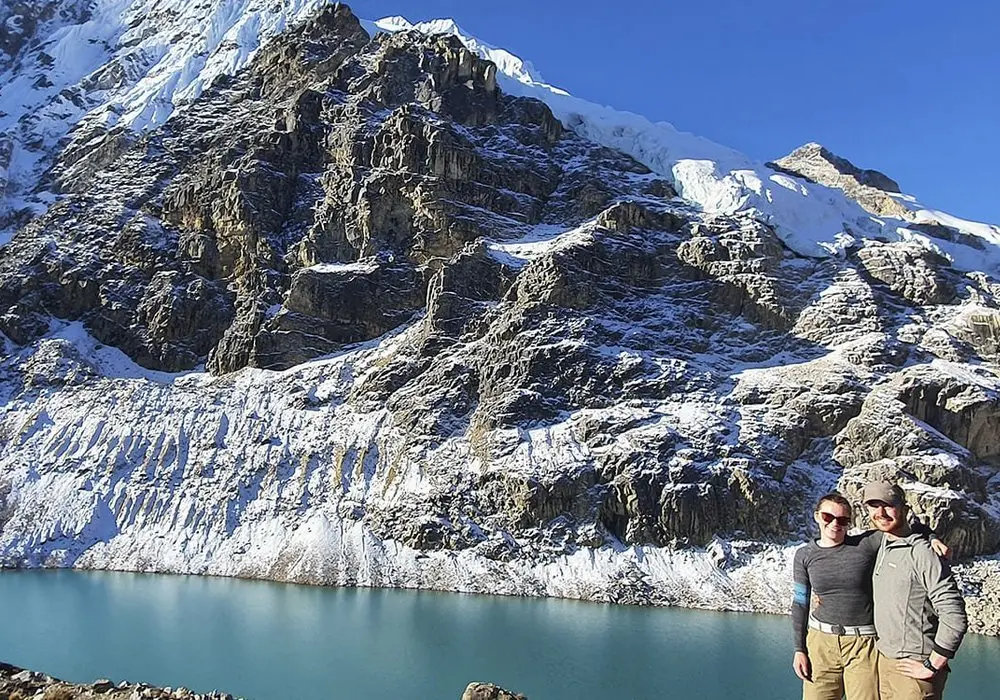
Most treks start with a relatively flat and gentle walk to the first campsite at Soraypampa. You might think, “This is easy!” But don’t be fooled. After lunch, the itinerary usually calls for a hike up to Humantay Lake (4,200m).
This is a steep, sharp ascent that takes about 1.5 hours. It is your first real test of altitude. The path is gravelly and steep. Many people find themselves gasping for air here. Think of Humantay Lake as a litmus test. If you struggle immensely here—if you feel dizzy, nauseous, or cannot catch your breath at all—it is a serious warning sign for Day 2. However, the view of the turquoise lake against the glacier is a reward that fuels your motivation.
Day 2: The Monster Day – Crossing the Salkantay Pass
- The Route: Soraypampa to Chaullay (or Colpapampa).
- Difficulty: Very Hard / Challenging.
This is the hardest day, hands down. You will likely be woken up at 4:30 AM or 5:00 AM with a cup of coca tea. The morning involves a relentless ascent to the Salkantay Pass.
The climb involves a section known colloquially as the “Seven Snakes”—a series of zig-zag switchbacks that seem to never end. As you climb, the vegetation disappears, replaced by rocks and snow. The wind picks up. The temperature drops. This is where mental toughness is required. You simply have to put one foot in front of the other.
Reaching the pass (4,630m) feels like a conquering hero moment. You are standing face-to-face with the apus. But the day isn’t over. The descent is brutal. You drop nearly 1,800 meters vertically down into the cloud forest. This downhill section takes hours and pounds the quadriceps. The transition from freezing alpine air to warm, humid jungle air in a single afternoon is exhausting for the body’s temperature regulation systems. By the time you reach camp, you will be thoroughly spent.
Day 3: The Jungle Recovery
- The Route: Chaullay to Lucmabamba (or Santa Teresa depending on itinerary).
- Difficulty: Moderate.
Technically, this day is “easier” because it’s mostly downhill or flat, following the Santa Teresa River. However, your legs will be screaming from the previous day’s descent. The path narrows, hugging the side of the valley with steep drop-offs into the river below.
The difficulty here shifts from cardio to environmental. It gets hot. Really hot. And the bugs come out. The “sand flies” or biting gnats in this region are notorious. Managing hydration and sun protection becomes the primary challenge. It is a beautiful walk through waterfalls and fruit plantations, but the humidity can drain your energy if you don’t drink enough water.
Day 4: The Final Push (Llaqtapata)
- The Route: Lucmabamba to Aguas Calientes via Llaqtapata.
- Difficulty: Moderate to Hard.
Just when you think the hard hiking is over, the trail throws a curveball: the climb to the Llaqtapata ruins. This involves a steep 2-3 hour climb through the jungle on an ancient, restored Inca trail. Many trekkers underestimate this because they think they are “done” with the mountains.
The humidity makes this climb sweaty and tough. However, the reward is unparalleled. From Llaqtapata, you get your first view of Machu Picchu across the valley. You see the citadel from a remote angle that few tourists ever witness. The descent from here to the Hydroelectric station is steep and muddy, testing your knees one last time before the long, flat walk along the train tracks to Aguas Calientes.
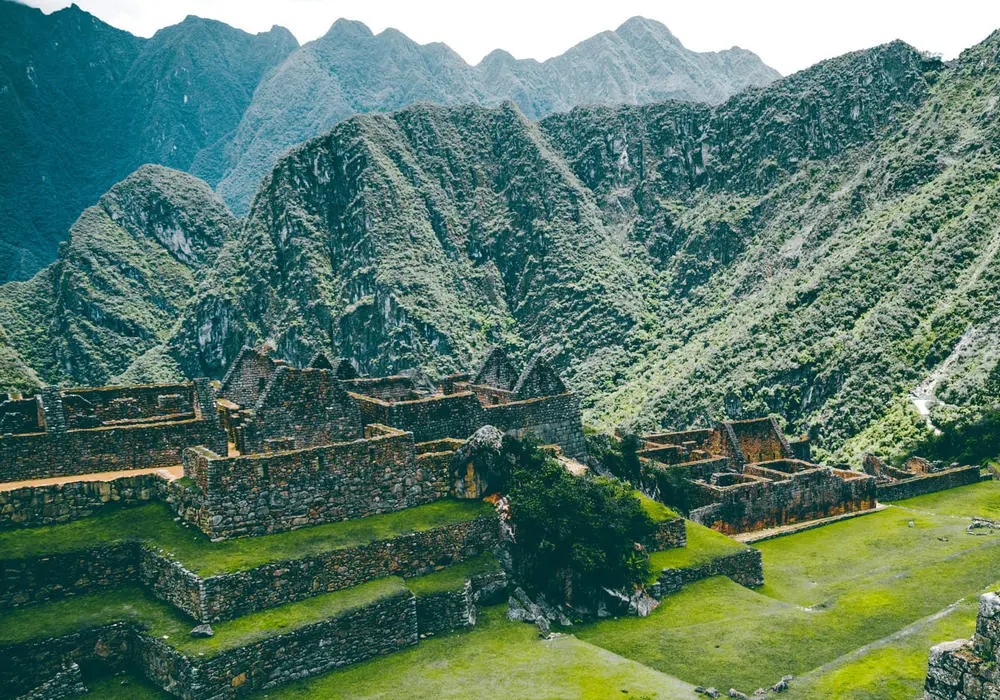
Day 5: Machu Picchu
- The Route: Aguas Calientes to Machu Picchu.
- Difficulty: Easy to Moderate.
The trekking is effectively over. The challenge now is waking up at 4:00 AM to get to the entrance. You can choose to walk up the stairs (about 1 hour of steep stairs) or take the bus. If you have tickets for Huayna Picchu or Machu Picchu Mountain, you have one final hike ahead of you, but the Salkantay trek itself is complete.
The Weather Factor: When to Go?
The difficulty of the trail fluctuates wildly depending on the season. The trail you walk in July is not the same trail you walk in February.
Dry Season (May – September):
- Conditions: Clear skies, incredible views, firm ground.
- The Challenge: Cold. The nights at Soraypampa can drop to -10°C (14°F). Sleeping in freezing temperatures can affect your rest, making the next day’s hike harder. The sun is also intense at high altitude; sunburn happens quickly.
- Verdict: This is the best time for stability, but requires high-quality cold-weather gear.
Wet Season (December – March):
- Conditions: Warmer nights, lush green landscapes, solitude.
- The Challenge: Rain, mud, and landslides. Hiking in mud adds a significant layer of physical stress. Your boots get heavy with mud, rocks become slippery, and morale can dip when you are soaked to the bone for hours. February is usually closed for the Inca Trail, and while Salkantay stays open, it can be dangerous due to landslides.
- Verdict: High difficulty due to trail conditions. Only for the adventurous who don’t mind getting wet.
Shoulder Season (April, October, November):
- Conditions: A mix of rain and sun. Fewer crowds than peak season.
- Verdict: The sweet spot for many, offering a balance of decent weather and solitude.
Physical Preparation: Training for the Savage Mountain
Do not underestimate the mountain. You need to train. The biggest mistake travelers make is thinking, “I’m young and healthy, I’ll be fine.” Altitude doesn’t care about your age.
Here is a practical training approach to lower the perceived Salkantay Trek difficulty:
- Cardio is King, but Strength is Queen: You need heart and lung capacity, yes. But you also need leg strength to carry your body weight up a mountain for hours. Running is good, but hiking is better.
- Stair Master is Your Friend: Find a tall building or a gym with a stair machine. Train going up and down. The eccentric muscle contraction of going downhill is what causes the most soreness. You need to condition your quads for the braking motion of descent.
- Wear Your Boots: Break in your hiking boots before you arrive in Peru. Do not bring brand new boots. Blisters are the number one mechanical reason people quit or suffer unnecessarily.
- Weighted Walks: Go for hikes on weekends carrying a backpack with 5-8kg of weight. Even if you hire porters or mules for your main duffel bag, your day pack containing water, cameras, and layers will feel heavy at 4,000 meters.
- Core Stability: Walking on uneven rocks requires a strong core to maintain balance. Planks and stability exercises will help prevent falls.
The Critical Factor: Acclimatization
You can be a marathon runner at sea level and fail on this trek. You can be a casual walker who lives in Denver and do just fine. Success on Salkantay is 40% fitness and 60% altitude adaptation.
Altitude sickness occurs because there is less oxygen available in the air. Your body needs time to produce more red blood cells to carry oxygen more efficiently.
The Golden Rule: Spend at least 2 days (ideally 3) in Cusco or the Sacred Valley before starting the trek. Cusco sits at 3,400m. If you fly in from Lima (sea level) and start trekking the next day, you are setting yourself up for misery. Use those days to walk around the city, drink coca tea, eat light meals, and rest.
Gear: What Actually Makes the Hike Easier?
Packing correctly directly impacts how hard the trek feels. Being cold, wet, or uncomfortable drains your energy faster than the hiking itself.
- Poles: Hiking poles are non-negotiable for Salkantay. They reduce the impact on your knees by up to 25% and give you two extra points of contact on slippery terrain. They are essential for the steep descent on Day 2.
- Footwear: Waterproof hiking boots with ankle support are superior to trail runners for this specific trek due to the rocky, uneven terrain and potential for mud.
- Layers: The temperature swings are violent. You need a moisture-wicking base layer (merino wool is best because it doesn’t smell), a fleece mid-layer for warmth, a down jacket for camp, and a high-quality rain shell.
- Hydration System: A CamelBak or water bladder (2-3 Liters) is better than bottles because it encourages you to drink small sips constantly. Hydration is the best prevention for altitude sickness.
Accommodation and Logistics: Roughing It vs. Glamping
The level of difficulty is also determined by how you sleep. Salkantay has evolved. It is no longer just cold tents on the ground.
- Budget Options: Basic camping tents with foam mats. If you sleep poorly on the ground, the next day’s hike will be significantly harder.
- Mid-Range to Luxury: Many operators now offer “Glass Domes” or “Sky Lodges” at Soraypampa and “Hobbit Houses” or jungle lodges later on. These offer real beds, blankets, and sometimes private bathrooms.
- The Impact: Booking a tour with better sleeping infrastructure is the single best “cheat code” to reduce the difficulty. Sleeping in a warm bed allows your muscles to recover fully, making the physical exertion of the next day much more manageable.
Is it Safe? A Note on Remote Trekking
Safety is a component of difficulty. The Salkantay Trek is remote. Unlike the Inca Trail, there are no park rangers patrolling every kilometer.
If you get injured on Day 2 near the pass, evacuation is difficult. It usually involves a horse ride down to a point where a vehicle can reach you, which can take hours. This reality means you must trek conservatively. Don’t run down the scree slopes. Watch your step on the river banks.
We strongly recommend booking with a reputable operator. Good companies carry emergency oxygen tanks, comprehensive first aid kits, and satellite phones or radios. Going solo is possible for experienced hikers, but it increases the risk significantly if things go wrong.
Comparison Summary: Salkantay vs. Inca Trail
| Feature | Salkantay Trek | Inca Trail |
| Distance | ~74 km (46 miles) | ~43 km (26 miles) |
| Max Altitude | 4,630m (Salkantay Pass) | 4,215m (Dead Woman’s Pass) |
| Terrain | Gravel, rock, dirt, mud | Stone steps, paved stones |
| Crowds | Moderate to Low | High (500/day limit but feels busy) |
| Scenery | Glaciers, Jungle, Coffee Farms | Ruins, Cloud Forest, Mountains |
| Booking | Flexible (can book last minute) | Strict (book 6 months ahead) |
| Overall Difficulty | High (Endurance & Altitude) | Moderate-High (Steepness) |
Final Verdict: Is the Salkantay Trek For You?
Let’s be real. The Salkantay Trek is a challenge. It will test your lungs, your quads, and your patience. There will be a moment on the switchbacks to the pass where you question your life choices. There will be a moment when the rain starts, and you wish you were on a beach.
But then, you reach the top. You stand face-to-face with the glacier, feeling the raw power of the Andes. You descend into the mystic fog of the cloud forest, surrounded by orchids and hummingbirds. You arrive at Llaqtapata and see Machu Picchu suspended in the distance, a view that feels earned, not bought.
If you are reasonably fit, respect the altitude, prepare with the right gear, and possess a spirit of adventure, the Salkantay Trek difficulty is a hurdle, not a wall. It is harder than the Inca Trail physically, but the rewards—the solitude, the raw nature, the diversity—are unmatched. This is not just a hike; it is an initiation. Train hard, pack well, and respect the Apu. The mountain is waiting to show you what you are truly capable of.